PyQt5 widgets
PyQt supports many widgets. Some of thesewidgets are: QPushButton, QLineEdit, QLabel, QTextEdit, QComboBox, etc. Each widget has its own specific functions and can be used in a variety of ways to create different UI features.
PyQt app
PyQt5 program basic format, if you use qtdesigner.
import sys
from PyQt5.QtWidgets import QMainWindow, QApplication, QLabel
from ui import Ui_MainWindow # Layout generated by qtdesigner

class MyApp(QMainWindow, Ui_MainWindow):
    def __init__(self):
        super(MyApp, self). __init__()
        self.setupUi(self)

if __name__ == "__main__":
    app = QApplication(sys.argv)
    window = MyApp()
    window.show()
    sys.exit(app.exec_())
QMainWindow main window
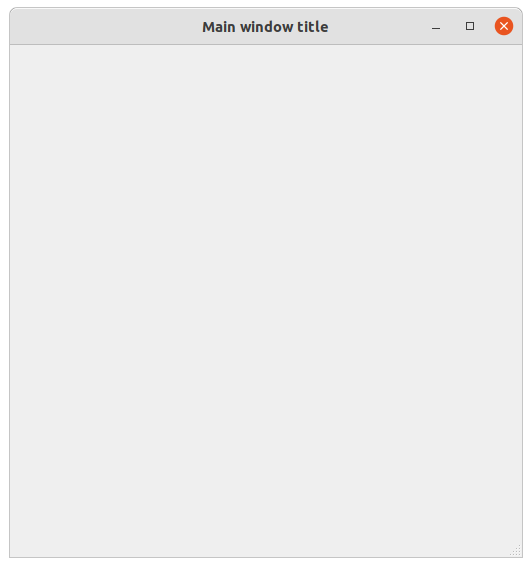
This code creates a basic window and sets the size, title and statusbar. It also sets the main window properties to be centered, this is optional but practical.
import sys
from PyQt5.QtGui import QIcon
from PyQt5.QtWidgets import QMainWindow, QDesktopWidget, QApplication


class MyApp(QMainWindow):
    def __init__(self):
        super(MyApp, self). __init__()
        self.resize(512, 512) # Set the size of the window
        self.status = self.statusBar() # Instantiate the creation of a status bar
        self.status.showMessage('Status Bar Tip', 4000) # # Show the tip in the status bar showMessage('Tip Message', display time in milliseconds)
        self.setWindowTitle('Main window title') # Set window title
        self.setWindowIcon(QIcon('logo.png')) # set icon
        self.move_center()


    def move_center(self):
        screen = QDesktopWidget().screenGeometry()
        form = self.geometry()
        x_move_step = (screen.width() - form.width()) / 2
        y_move_step = (screen.height() - form.height()) / 2
        self.move(x_move_step, y_move_step)


if __name__ == "__main__":
    app = QApplication(sys.argv)
    window = MyApp()
    window.show()
    sys.exit(app.exec_())
QLabel labels
The QLabel widget provides support for displaying text and images. You can use it to display either static or dynamic content such as JSON data loaded from a URL. The latter case is particularly useful if you want to create a live dashboard that displays data updated in real time.
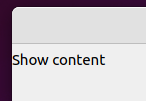
Display the text. Import QLabel from QtWidgets.
label = QLabel(self)
label.setText("Show content") # Write
text = label.text() # read
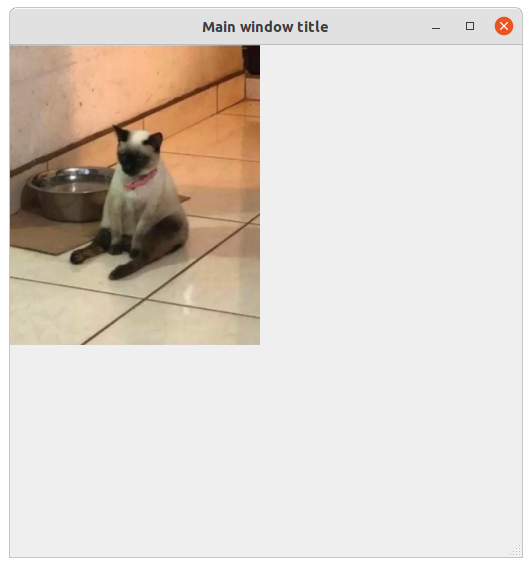
Display the image. Import QPixmap from PyQt5.QtGui. You can use label.resize() to set the width and height.
label = QLabel(self)
pixmap = QPixmap("file path")
label.setPixmap(pixmap)
label.setScaledContents(True) # Set the image to scale with the QLabel size
label.setAlignment(Qt.AlignCenter) # set the image to be centered
Combine with opencv to display images (easy to handle images)
label = QLabel(self)
label.setPixmap(QPixmap("")) # Remove the image from the QLabel
img = cv2.imread("file path") # read the image, the path can not have Chinese
img = cv2.cvtColor(img, cv2.COLOR_BGR2RGB) # bgr -> rgb
h, w, c = img.shape # Get the shape of the image
image = QImage(img, w, h, 3 * w, QImage.Format_RGB888)
pixmap = QPixmap.fromImage(image)
label.setPixmap(pixmap)
label.setScaledContents(True) # Set the image to scale with the QLabel size
QTextBrowser Text Browser
Set, append, get text
text_browser = QTextBrowser(self)
text_browser.setText(a) # set the text
text_browser.append(a) # append text
text = text_browser.toPlainText() # Get the text

QTextEdit Text Editor
QTextEdit supports both editing and displaying rich text documents including formatted paragraphs, lists, images and tables . It also includes spell checker support out of the box making it ideal for writing longer pieces of text such as articles or documentation.
One feature that sets it apart from other similar widgets is its built-in Undo/Redo stack which allows users to undo and redo their changes without having to write any custom code.
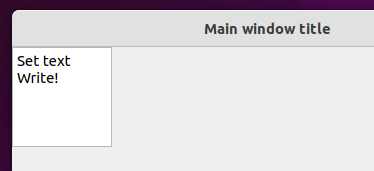
This is an input text field. You can set, append, get text
text_edit = QTextEdit(self)
text_edit.setText(a) # set text
text_edit.append(a) # append text
text = text_edit.toPlainText() # Get the text
QPushButton button
QPushButton is probably the most basic widget that you can use with PyQt5. It provides a button that when clicked, will emit a signal. This signal is then connected to a slot which can be used to perform an action. For example, you could connect the clicked signal to a function that opens a new window.
Pressing triggers the event:
button = QPushButton(self)
button.setText("button")
button .setChecked() # set to checkable
button.clicked.connect(clicked_function) # Press to trigger

def clicked_function():
	pass

QCheckBox checkboxes
check_box = QCheckBox(self)
check_box.setChecked() # set to checked by default
check_box.setCheckable(True) # set to checkable
check_box.stateChanged.connect(check_box_changed) # State change triggers the check_box_changed function

def use_external_camera(self, status):
    if status == Qt.Checked: # If status is checked
		pass
    else:
		pass

QRadioButton radio button
radio_button1 = QRadioButton()
radio_button2 = QRadioButton()

radio_button1.setChecked(True) # Set checked, only one can be checked at a time
radio_button1.toggled.connect(radio_button_changed) # press to trigger the radio_button_changed function
radio_button2.setChecked(False) # set unchecked
radio_button2.toggled.connect(radio_button_changed) # press to trigger the radio_button_changed function (shares the same function)

def radio_button_changed():
    if radio_button1.isChecked(): # return if checked or not
        pass
    elif radio_button2.isChecked():
        pass
QMessageBox pop-up boxes
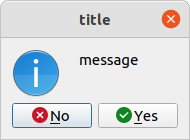
The QMessageBox dialog box contains only different types of icons, but there is no big difference:
- QMessageBox.information information box
- QMessageBox.question Question
- QMessageBox.warning warning
- QMessageBox.ctitical Danger
- QMessageBox.about about
reply = QMessageBox.information(self, "title", "message", QMessageBox.Yes | QMessageBox.No)
if reply==QMessageBox.Yes:
    ...
else:
    ...
QSlider slider
Slider sets upper and lower limits, sets current value, sliding triggers event
slider = QSlider()
slider.setOrientation(Qtcore.Qt.Horizontal) # set to horizontal slider
# slider.setOrientation(Qtcore.Qt.
slider.setMaximum(100) # Set the maximum value
slider.setMinimum(0) # set the minimum value
slider.setValue(72) # set the current value
value = slider.value() # get the current value
slider.valueChanged.connect(change_function) # trigger the change_function function when changing the value
QDialog prompt window
QDialog prompt window with a QLineEdit field. It adjusts the size automatically.
QLineEdit is another basic Qt Widget which allows the user to input text into a single line. You can set validators on the widget which restrict what kind of text the user can input such as an integer or email address. You can also set an echo mode which determines how the text entered by the user is displayed such as plaintext or stars (*).
dialog = QDialog()
dialog.adjustSize() # Automatically change size with content
text = QLineEdit(message, dialog) # Add space to display prompt text
text.adjustSize()
# Set window property to ApplicationModal modal, user can close main interface only after closing popup window
dialog.setWindowModality(Qt.ApplicationModal)
dialog.exec_() # block the execution, only call show to destroy immediately after execution
QFileDialog opens a file or folder
QFileDialog.getOpenFileName Gets the file name
QFileDialog.getExistingDirectory Get the folder name

file_name, _ = QFileDialog.getOpenFileName(self, 'title', '. /', 'Image files(*.jpg *.gif *.png)') # You can set the default path and optional file type
folder_name = QFileDialog.getExistingDirectory(self, 'title', '. /') # Default path can be set
QTreeView directory tree structure
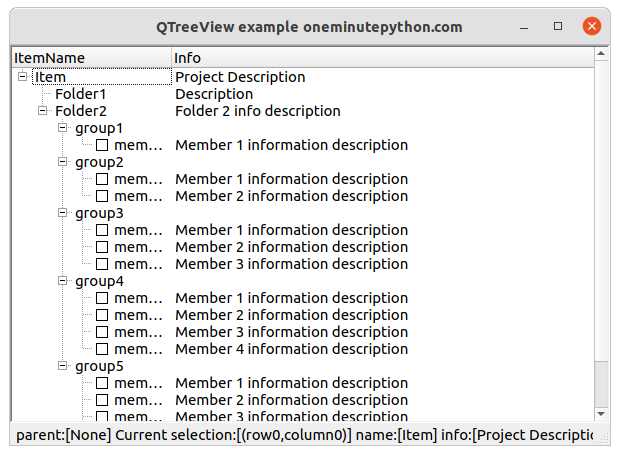
Create a directory tree result and display the tree structure of the current path, double click on the file to trigger the function
tree_model = QDirModel()
# or
# tree_model = QFileSystemModel()
# tree_model.setRootPath(os.getcwd()) # Set the root directory to the current directory
tree_view = QTreeView()
tree_view.setModel(tree_model )
tree_view.setRootIndex(self.dirModel.index(os.getcwd())) # set the current directory (without this statement the default C drive path)
tree_view.setWindowTitle(self.treeView.tr("current directory")) # show title... Doesn't seem to work
treeView.doubleClicked.connect(tree_cilcked_function) # double click on the file to trigger the tree_cilcked_function function
tree_view.show()

# Function call method
def tree_cilcked_function(self, file_index):
	file_name = tree_model.filePath(file_index)
	...
QTimer Timer
Set timer time, time to trigger time, loop execution
timer = QTimer()
timer.timeout.connect(process_function)
timer.start(20) # set the timer time to 20ms and start the timer
timer.stop() # stop the timer
def process_function():
	---
QSystemTrayIcon tray
System tray example
tray = QSystemTrayIcon(QIcon('. /icon/cut.png'), self) # Create a system tray object and pass it to the main window
tray.activated.connect(func) # Set tray click event handler
tray_menu = QMenu(QApplication.desktop()) # create menu
action1 = QAction(u'restore ', self, triggered=func2) # Add a first-level menu action option (restore main window)
action2 = QAction(u'quit ', self, triggered=fun3) # Add a first-level menu action option (quit the program)
tray_menu.addAction(action1) # Add an action to the menu
tray_menu.addAction(action2)
tray.setContextMenu(tray_menu) # Set the system tray menu
tray.show()
Get the screen resolution
desktop = QApplication.desktop()
# Get the monitor resolution size
screenRect = desktop.screenGeometry()
height = self.screenRect.height()
width = self.screenRect.width()
Get a screenshot
screen = QApplication.primaryScreen()
pixmap = screen.grabWindow(0)
Set the window to change automatically with the size of the content
QWidget().adjustSize()
Get mouse events
def mousePressEvent(self, QMouseEvent):
    pass

def mouseReleaseEvent(self, QMouseEvent):
    pass

def mouseMoveEvent(self, QMouseEvent):
    pass
Common properties of QMouseEvent
QMouseEvent.x() # Mouse coordinate x
QMouseEvent.y() # mouse coordinate y
QMouseEvent.button() # button, enumerated type Qt.LeftButton / Qt.RightButton
QPixmap object to byte stream
shot_bytes = QByteArray()
buffer = QBuffer(shot_bytes)
buffer.open(QIODevice.WriteOnly)
shot_img = self.get_shot_img()
shot_img.save(buffer, 'png') # save to buffer object
data = shot_bytes.data() # Get the byte stream